Installing XM radio in a 2006 Toyota Sienna
(CLICK ANY PHOTO FOR A LARGER VERSION)I wanted satellite radio and I decided to install the Vaistech SLX adapter into our Sienna. This adapter basically acts as the middleman between an XM tuner box and the Toyota's factory radio. Mine came with the E7007, which has navigation, Bluetooth, and a JBL sound system.
So, to do this install, you need to purchase a Vaistech SLX, XMDirect XMD1000 (approx $30 from Amazon), and a set of RCA stereo cables to connect the two boxes - you can recycle some old wires you might have or get some decent Monster cable if you want.
For the tools, you basically need a plastic knife and/or a plastic putty knife to remove some of the trim, a 10mm ratchet with extension to remove the navigation unit and tail light mount, and some Velcro to secure the boxes inside the car.
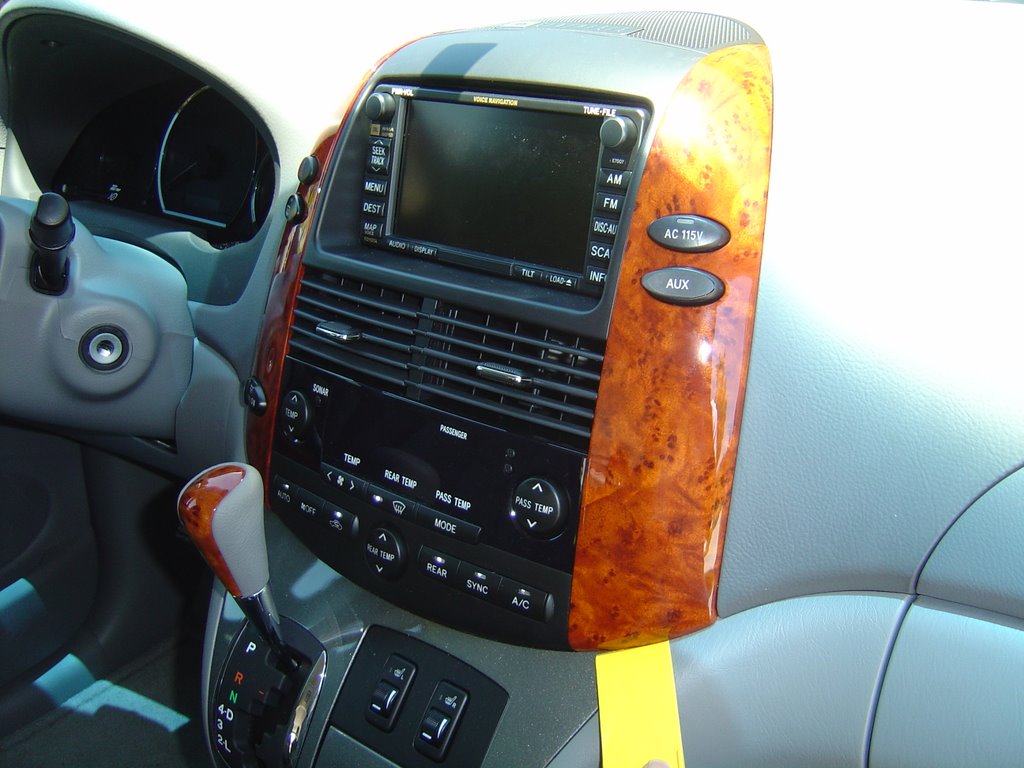
To start, let's remove the wood trim on both sides of the navigation unit. Use the putty knife to get underneath the wood and gently pry up. You will feel it give a little and then you can gently use your fingers to work the wood trim out. Note the buttons will come out with the trim, as they are attached to the trim and there is a cable behind them that connects the buttons to the van's electrical system. There is enough slack in the cable to just let it hang. You don't need to disconnect the cables.
You can see what it looks like once you take the
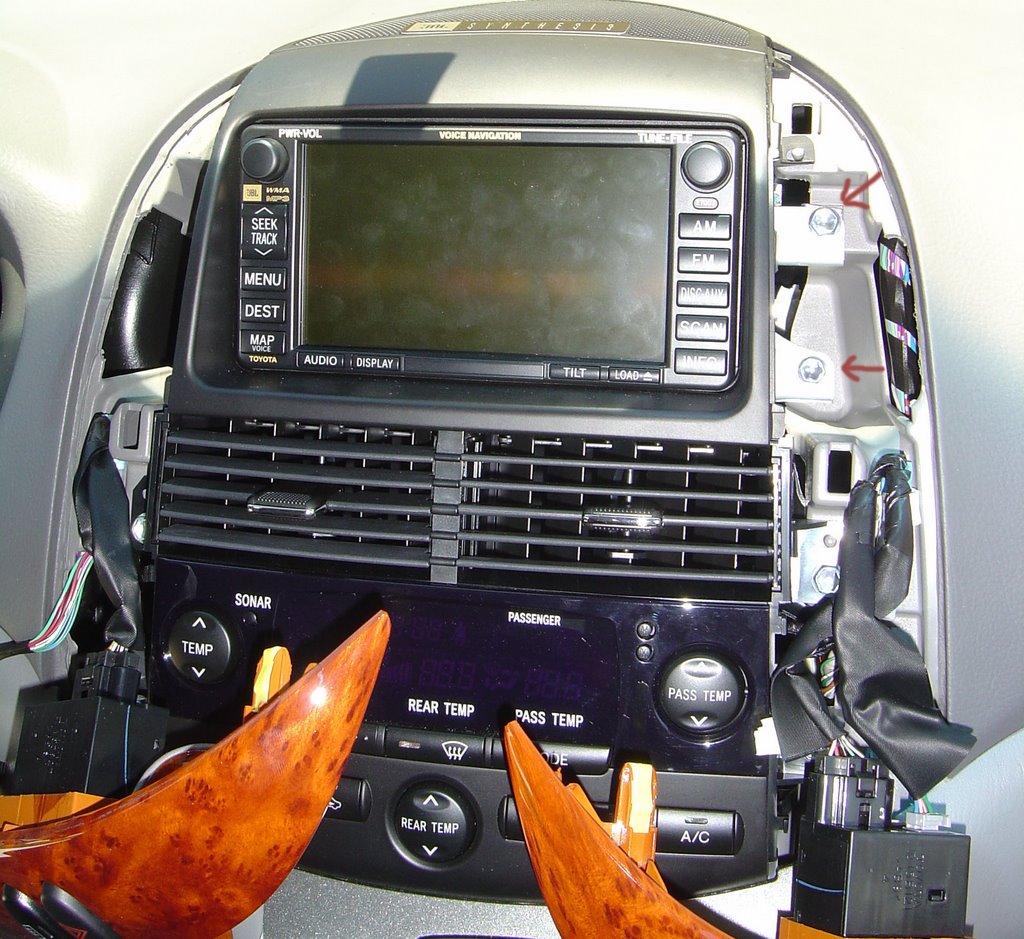 wood trim off. I have drawn a couple arrows indicating which bolts need to be removed with the 10mm ratchet. The lower one is recessed and therefore needs an extension. There are two identical ones on the other side as well.
But before you remove the bolts, you need to remove the speaker screen from above the navigation unit. It will pry up using a putty knife or a plastic knife as shown in the photo. Simply pry up in the front, then wiggle it out up and towards the windshield.
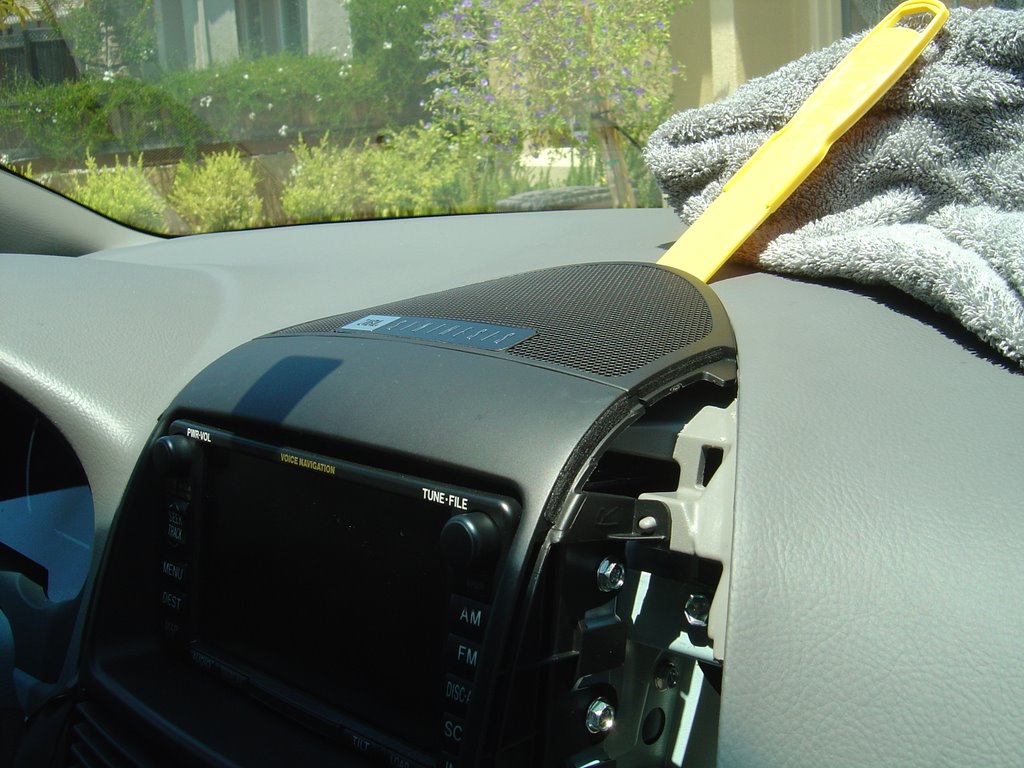
Once you remove the bolts, the navigation system slides right out. Now you are ready to remove the bolts that secure the navigation system. In the picture, I have pulled it out and
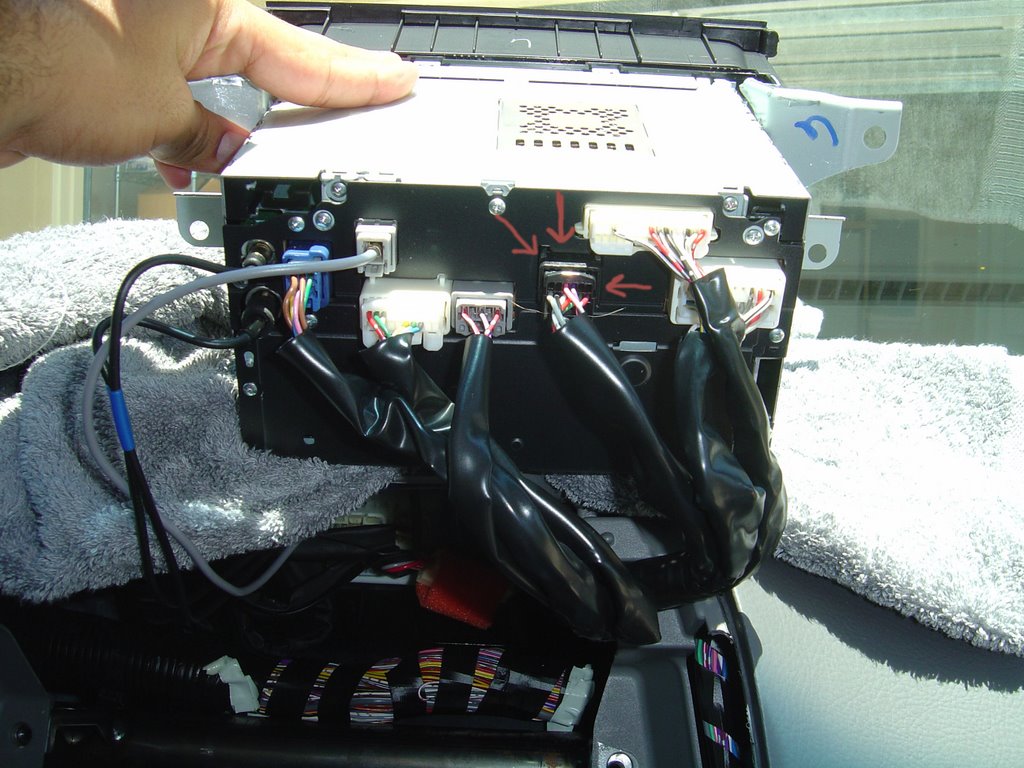
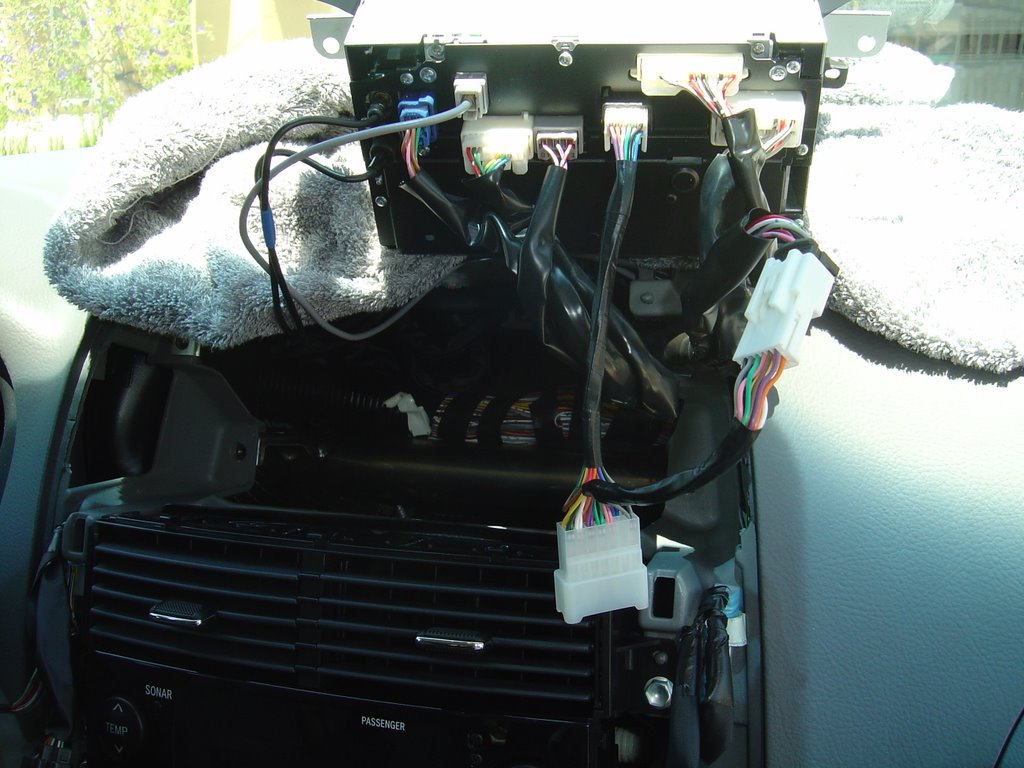
 flipped it up. I've drawn an arrow to the connector you need to unplug in order to plug in the Vaistech bypass cable.
There is also a photo of what it looks like when you have installed the Vaistech cable and plugged the Toyota factory cable into the Vaistech cable.
Once you've got this done, you can leave the unit on the dashboard, flipped up, resting on a towel, or you can loosely slide it back in.
 Next is to mount and route the antenna. If you are using the XMD1000, it includes a magnetic mount antenna that does the job just fine. I located the antenna on the roof of the van, near the rear liftgate. It was closer to the passenger side, not dead center, because there is a little plastic nub on the antenna connector that didn't fit through the narrow opening in the center of the roof. The Sienna liftgate gap seems to widen out as you go to the side of the car. There's a photo of where the cable drops through the gap. Based on the other liftgate equipment you see in the photo, you will be able to determine exactly where on the roof I installed it.
 Next, just tuck the antenna wire under the liftgate weather stripping and follow it down the right side of the van until you reach the tail light assembly. Use the 10mm ratchet to remove the bolts securing the tail light assembly to the van. Remove the assembly with a gentle tug - you will notice a few metal posts on the side that help secure the assembly.
Place the antenna wire through the taillight opening and grab it from the other side by opening the vehicle's tire jack storage compartment. Your antenna wire is now inside the van! Now, all that's left is to route the wire to
 the front of the cabin so you can wire it up to the XM box. I basically fed the wire back out using the space that exists between the plastic side panel and the carpet. I used the putty knife to get the wiring under the carpet up until it reaches the right passenger door sill.
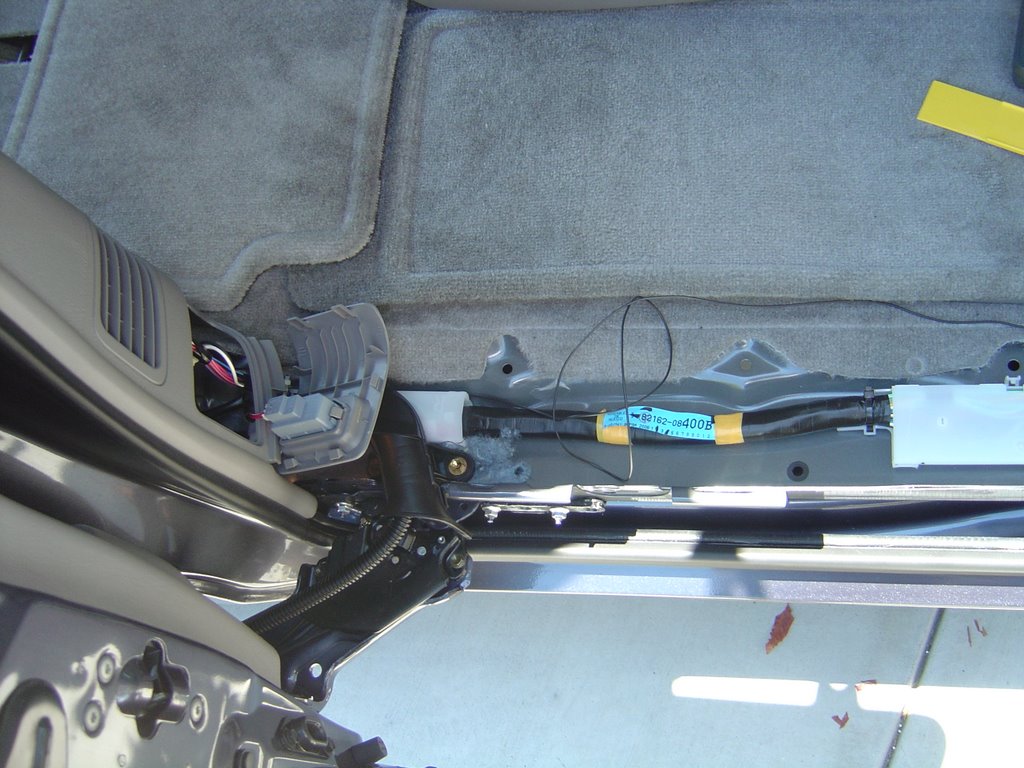 At the right passenger door sill, you can just lift up the sill from either side and it will start popping out - it's held in place with those standard plastic panel fasteners. Once you get the sill out, you'll see a nice area for you to tuck the wire and feed it to the front. Do the same for the front passenger sill.
In front of the front passenger sill, there is another plastic trim piece that comes off - it's held in place with a little screw nut and then you can just gently pull it off.
Next step is to remove the glove compartment
 and the little storage box above the glove compartment. To remove the glove compartment, you must disengage "the claw", which is a black cylindrical piece of plastic on the right side near the bottom of the glove compartment. Just squeeze the little plastic tabs with some longnose pliers and then slide the claw off the post. Next just press both sides of the glove compartment box inward with moderate pressure. This will expose two posts that hold the glove compartment in. Once those posts clear the frame, just open the glove compartment some more and it will pop out.
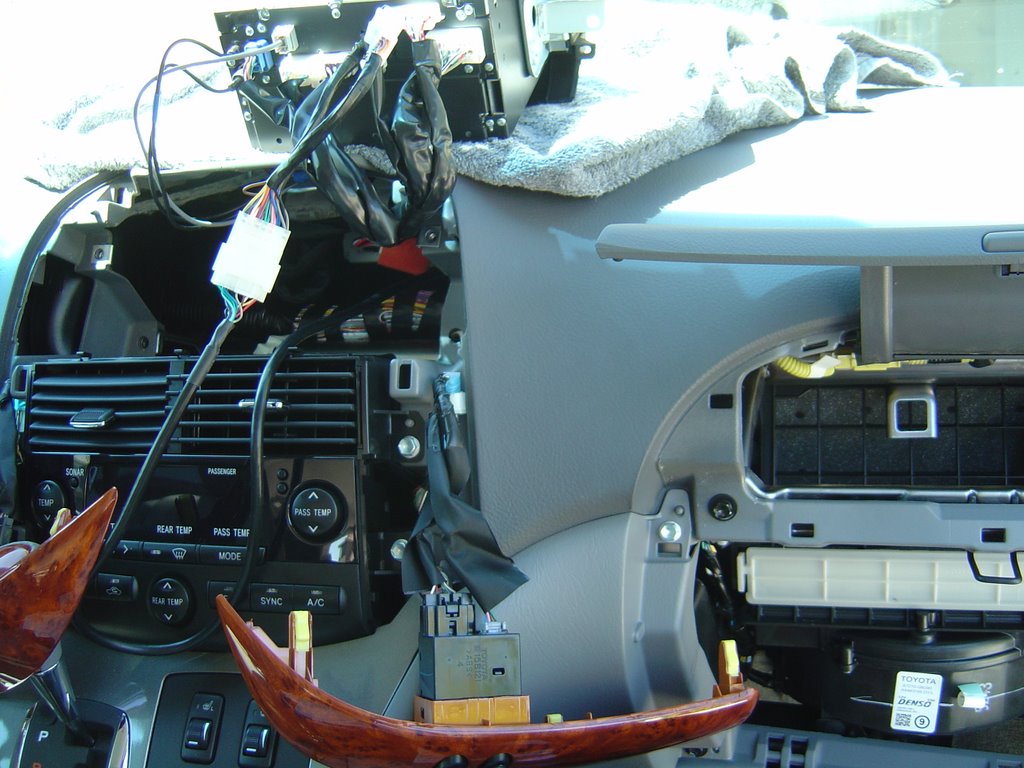 For the compartment above the glove box, you don't need to remove the door, just the plastic box. Once the door is open, just pull forward on the box and it will also pop out.
Finally, you need to remove the upper dash trim piece on the right side of the car. This piece is located on the side of the passenger airbag and it can only be accessed if the passenger door is open. Just use the putty knife to get under there and pry the front so you can pop it off.
You now have full clearance to route the Vaistech wire behind the head unit and behind the upper glove box. I mounted my XM/Vaistech boxes on the right side behind the glove compartment. I used some Velcro tape and a couple of nylon ties to hold the boxes to the frame.
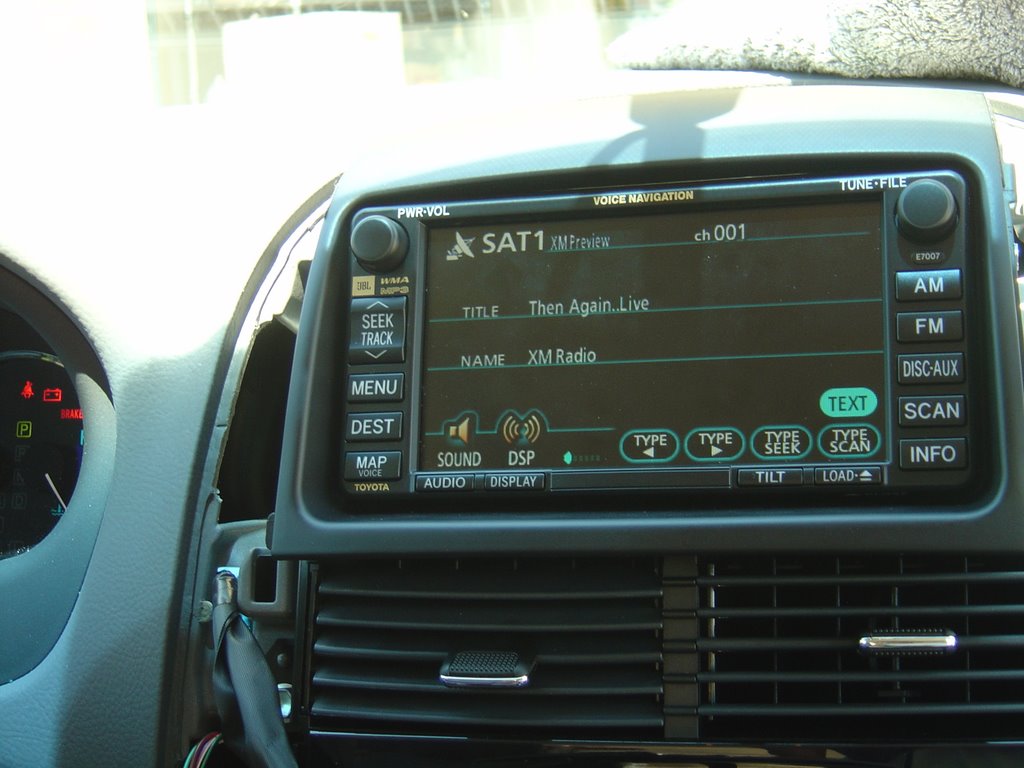 One final note - before you start ripping panels off....when I had the head unit out and connected the Vaistech cable, I wired everything up on the floor of the van just to make sure it all worked. Sometimes you might get a bad XM unit or something and it would be bad to have to rip apart your trim only to discover that stuff doesn't work. Once you get the XM preview channel, you know that it's safe to start the permanent install work.
Enjoy your XM!
posted by Fred Smith @ 10:05 PM
![]()

6 Comments:
Just wanted to thank you for taking the trouble to post details of your installation. I know I wouldn't have attempted this install if I hadn't come across your posts at SiennaClub.org. Thanks to you I now have XM integrated with my Nav head-unit on my 2006 Toyota Sienna!
Nice write up. Are you a member at SiennaClub.org?
Thanks for posting this how-to. Did it for my wife's Sienna as a Mother's Day present so she now has Sirius integrated. She really likes it.
Thanks, but my only question is what do you mean by remove the upper right dash piece? No pictures so I'm not sure, Thanks!!!
Thanks, but what do you mean by "upper right dash piece? No pictures. Thanks!
Thanks for the great instructions. The process was so much simpler than I would have imagined.
Post a Comment
<< Home